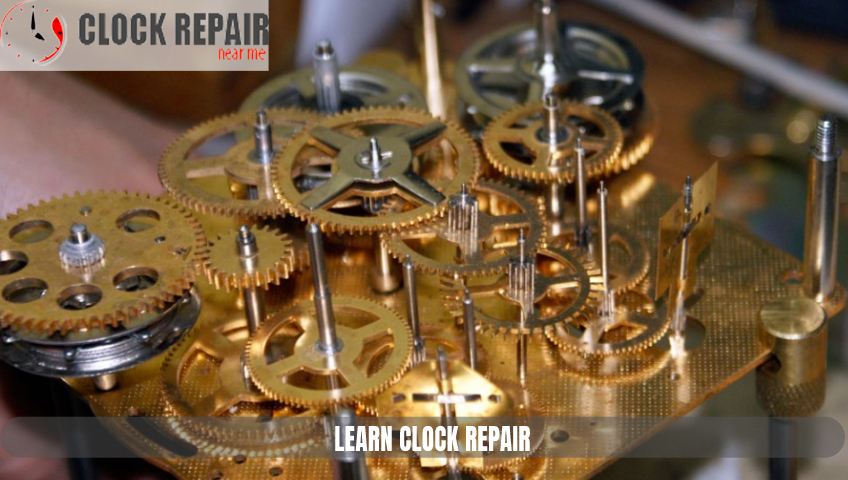
Clocks have been a staple of human life for centuries. They have served as important tools for keeping track of time and ensuring punctuality. However, like any other piece of machinery, clocks are subject to wear and tear over time, leading to the need for learn clock repair. For those interested in learning clock repair, there are many resources available that can help. The first step is to understand how clocks work. Clocks rely on a series of gears and springs to keep time, and each component must be perfectly calibrated in order for the clock to function properly.
One of the best ways to get started with clock repair is to take a class or workshop. Many local community centers and adult education programs offer courses on clock repair, which provide hands-on experience and guidance from experienced instructors. In addition to classes, there are many books and online resources available that can help individuals learn clock repair on their own. These resources cover everything from basic terminology and tools to advanced techniques for repairing complex clock mechanisms.
When learning clock repair, it’s important to be patient and take your time. Clocks are delicate pieces of machinery, and rushing through repairs can cause further damage. It’s also important to have the right tools on hand, including specialized screwdrivers, pliers, and lubricants. Ultimately, learning clock repair can be a rewarding and fulfilling hobby for those who enjoy working with their hands and have an interest in mechanical engineering. With the right resources and approach, anyone can become proficient in repairing clocks and keeping these timeless machines ticking for generations to come.
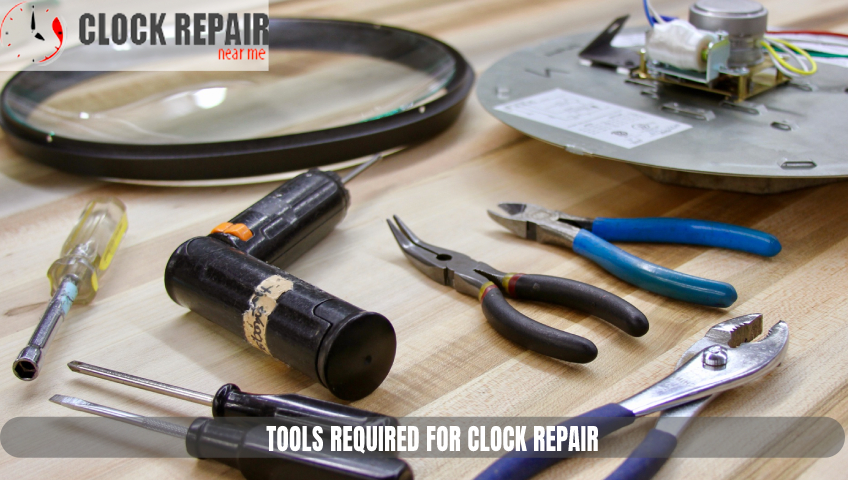
Tools Required for Clock Repair
Clocks are an essential part of our daily lives, and they provide us with the necessary information about time. However, over time, clocks may stop working correctly due to wear and tear or other issues. As a result, it’s important to have a basic understanding of clock repair tools and their uses. The first tool that every clock repair enthusiast should have is a set of screwdrivers. These come in various sizes and shapes, and they are used to remove or tighten screws on the clock’s movement or case. It’s essential to choose the right size of screwdriver to avoid damaging the screw heads. The second tool required for clock repair is pliers. Pliers are used to hold small components in place while you work on them. They are also useful for bending and shaping wires to fit specific parts of the clock.
Thirdly, a pair of tweezers is an essential tool for clock repair. They are used to handle small parts of the clock carefully, such as gears, springs, and screws, which can be challenging to manipulate by hand. Another tool that is crucial for clock repair is a magnifying glass. This tool helps you see the small components of the clock more clearly, especially when they’re hard to spot. A magnifying glass can also help you identify any damage or rust on the clock’s parts. Clock oil is another critical tool for clock repair. It’s used to lubricate the moving parts of the clock, reducing friction and preventing wear and tear. The oil also protects the movement from rust and corrosion.
Finally, a set of files is necessary to repair or replace damaged parts. Files are used to shape and smooth the edges of gears, pivots, and other metal components. In conclusion, having the right tools is vital for successful clock repair near me. A set of screwdrivers, pliers, tweezers, a magnifying glass, clock oil, and files are essential tools for clock repair enthusiasts. These tools help you repair and maintain your clocks, ensuring they continue to function correctly for a long time. With these tools in hand, anyone can learn how to repair or maintain their clocks with ease.
Common Issues with Clocks and Their Solutions
Clocks have been a part of our lives for centuries, and they play a crucial role in keeping us on schedule. However, like any other mechanical device, clocks can experience issues that may require troubleshooting. In this article, we will discuss common issues with clocks and their solutions. One of the most common problems with clocks is inaccurate timekeeping. This issue can be caused by a variety of factors, such as low battery power or a misaligned clock mechanism. To solve this problem, replace the battery if necessary, or try adjusting the hands of the clock to ensure they are properly aligned.
Another issue that can arise with clocks is erratic ticking or chimes. This can be caused by a damaged clock mechanism or loose parts within the clock. To fix this issue, you will need to disassemble the clock and examine its internal components. Tighten any loose parts or replace damaged ones, and the clock should function smoothly again. Occasionally, clocks may stop working altogether. This could be due to a dead battery or a broken clock mechanism. If the battery is dead, simply replace it with a new one. If the mechanism is broken, you may need to take the clock to a professional repair technician to get it fixed. Sometimes, clocks may make an unusual noise while operating. This can be caused by various factors such as dust accumulation or a loose component. To fix this issue, clean the clock thoroughly with a soft cloth and tighten any loose parts.
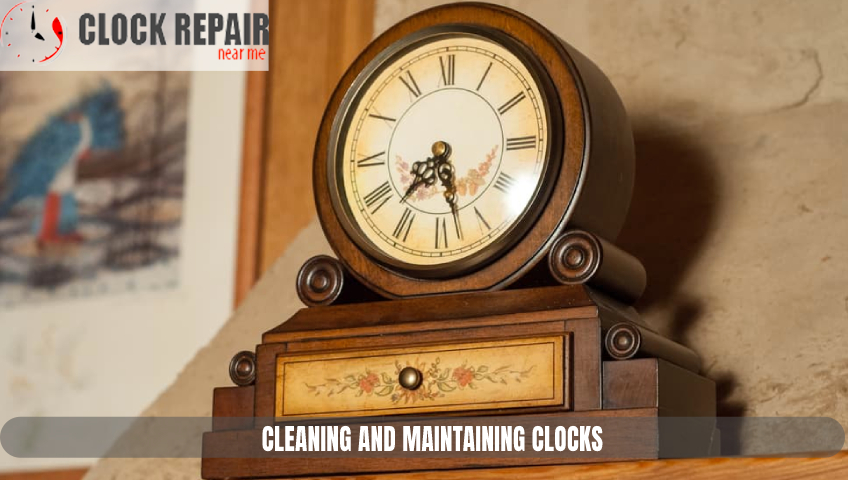
Cleaning and Maintaining Clocks
Clocks are an essential part of our everyday life, as they help us keep track of time and plan our daily activities. However, many people overlook the importance of proper clock maintenance, which can lead to malfunctioning and even damage to the clock over time. In this article, we will discuss some tips on how to clean and maintain your clocks to ensure their longevity. Firstly, it is important to note that different types of clocks require different cleaning methods. For example, mechanical clocks should be handled with care, as they contain delicate moving parts that can be easily damaged. On the other hand, digital clocks are more durable and can be cleaned with a soft cloth and mild detergent solution.
To clean a mechanical clock, you should start by removing the dust from the exterior using a soft-bristled brush. Next, you can carefully remove the clock face and hands using a specialized clock key or screwdriver. Once the interior is exposed, you can use a cotton swab or soft-bristled brush to gently clean the moving parts and gears. It is important not to use any harsh chemicals or water when cleaning a mechanical clock, as these can cause rust and corrosion. Digital clocks can be cleaned using a soft cloth and mild detergent solution. You should start by unplugging the clock and wiping down the exterior with a damp cloth. Next, you can use a soft-bristled brush or toothbrush to clean any hard-to-reach areas. Be sure to dry the clock thoroughly before plugging it back in.
In addition to regular cleaning, it is also important to lubricate the moving parts of a mechanical clock periodically. This can be done using a specialized clock oil, which should be applied sparingly and only to the necessary parts. Over-lubrication can cause the clock to run too fast or stop working altogether. In conclusion, cleaning and maintaining your clocks is crucial to ensure their longevity and proper functioning. By following the tips outlined in this article, you can keep your clocks in good condition for years to come. Remember to handle mechanical clocks with care and avoid using harsh chemicals or water when cleaning them. With proper maintenance, your clocks will continue to serve you well for many years.
Replacing Clock Parts
Clocks have been around for centuries, and they remain a fundamental part of our lives. They tell us the time, keep us on schedule, and remind us of important events. However, over time, clock parts wear out or become damaged, leading to malfunctions that can disrupt our daily routines. Fortunately, you don’t need to replace your entire clock to fix these issues. Instead, you can replace individual clock parts, such as the clock hands, pendulum, or movement. In this article, we’ll provide you with a step-by-step guide on how to replace clock parts.
Step 1: Identify the faulty part
The first step in replacing a clock part is identifying the problem. Carefully inspect your clock and determine which part needs to be replaced. Look for signs of wear and tear, damage, or malfunction.
Step 2: Gather your tools
Once you’ve identified the faulty part, gather the necessary tools. This usually includes pliers, screwdrivers, lubricant, and replacement parts. Make sure to purchase high-quality replacement parts from a reputable source.
Step 3: Remove the old part
Using your tools, carefully remove the damaged or worn-out part. Be gentle to avoid causing any additional damage.
Step 4: Lubricate and install the new part
Before installing the new part, apply a small amount of lubricant to ensure smooth operation. Then, carefully install the new part, following the manufacturer’s instructions.
Step 5: Test the clock
Once you’ve installed the new part, test your clock to make sure it’s working correctly. If everything is functioning properly, you’re done! If not, repeat the process or seek professional help.
In conclusion, replacing clock parts is a straightforward process that can save you time and money. By following these simple steps, you can fix common clock problems and keep your clock running smoothly for years to come. Remember to be patient, gentle, and thorough in your approach, and always use high-quality replacement parts from a reputable source.

Advanced Clock Repair Techniques
Clock repair is a delicate process that requires skill and precision, especially when dealing with antique or vintage timepieces. Advanced clock repair techniques are necessary for restoring these valuable items to their former glory. In this article, we will explore some of the advanced clock repair techniques that professionals use to keep these precious timekeepers ticking. The first technique in advanced clock repair is pivot polishing. The pivots on a clock’s movement are small metal pins that allow the gears to rotate. Over time, these pivots can wear down, causing the clock to stop working. By polishing the pivots, the clock repair technician can smooth out any rough spots and extend the lifespan of these critical components.
Another advanced technique used in clock repair is bushing replacement. Bushings are small metal sleeves that support the pivots and reduce friction between moving parts. If the bushings become worn or damaged, they can cause the clock to run erratically or stop altogether. To replace the bushings, the clock repair technician must remove the movement from the clock case and carefully install new bushings using specialized tools. In addition to these techniques, advanced clock repair may also involve re-pivoting, which involves replacing worn or damaged pivots entirely. This process requires a high degree of skill and precision, as the new pivots must be precisely aligned with the other components in the movement.
Finally, advanced clock repair may also include cleaning and restoration. Over time, the delicate inner workings of a clock can become dirty or tarnished, affecting its accuracy and overall appearance. Professional clock repair technicians have the tools and knowledge to clean and restore these timekeepers, ensuring they maintain their value and functionality for years to come. In conclusion, advanced clock repair techniques are essential for keeping vintage and antique clocks running smoothly. From pivot polishing to bushing replacement and re-pivoting, these techniques require skill and precision to ensure that the clock stays accurate and functional. With the help of a professional clock repair technician, these precious timekeepers can remain in excellent condition for generations to come.