
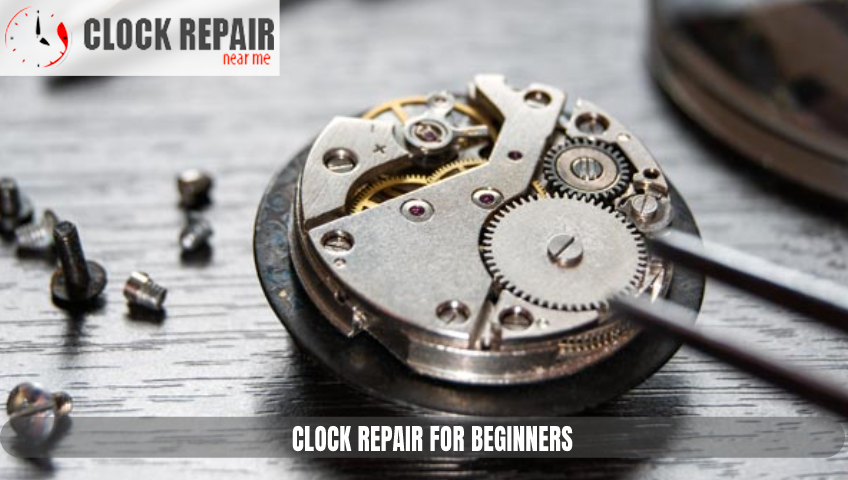
Are you tired of constantly glancing at your broken clock or watch and wondering what time it is? Have you ever thought about repairing it yourself but don’t know where to start? Well, fear not because clock repair for beginners is easier than you think! Firstly, you need to identify the problem. Is your clock not ticking? Is it running too fast or too slow? Once you have identified the issue, it’s time to gather the necessary tools. These include a screwdriver, pliers, oil, and cleaning solution. Next, you need to disassemble the clock. This can be tricky, so make sure you take photos or make a note of how it looked before you started. Once you have taken it apart, clean all the parts with the cleaning solution and dry them thoroughly. Now comes the fun part: fixing the problem. If your clock isn’t ticking, check the battery or replace it if needed. If it’s still not working, try adjusting the escapement. If your clock is running too fast or slow, adjust the pendulum. This may require some trial and error, but don’t get discouraged. Clock repair is a learning process.
Once you have fixed the problem, it’s time to put everything back together. Be patient and take your time. If you rush, you might end up breaking something. Once it’s reassembled, oil the moving parts and test it out. If all went well, congratulations! You just repaired your first clock. However, if you’re still having problems, don’t worry. It takes time and practice to become a skilled clock repairer. Keep trying and learning from your mistakes. In conclusion, clock repair for beginners can be an enjoyable and rewarding experience. With the right tools, patience, and willingness to learn, anyone can fix their broken clock or watch. So go ahead and give it a try! Who knows, you might discover a new hobby or even a future career.
How to Remove the Clock Movement
Have you ever owned a clock that has stopped working or needs to be repaired? Removing the clock movement is an essential part of the process. However, it can be intimidating for those who have never done it before. In this article, we will guide you through the steps on how to remove the clock movement safely and effectively. Firstly, make sure you have the necessary tools such as pliers, screwdrivers, and wire cutters. Turn off the clock and remove any weights and pendulum from it. Remove the clock face by unscrewing the screws that hold it in place. Be gentle while doing so as the clock face is delicate and can easily break.
Next, carefully remove the hands of the clock by gently pulling them outwards. Use pliers if you find it difficult to do so. Once the hands are removed, you should see a nut that holds the clock movement in place. Remove the nut with pliers or a wrench and then carefully remove the clock movement from its position. It’s important to remember that clock movements are fragile and require gentle handling. Avoid using excess force when removing them. You may also need to detach the wires that connect the clock movement to the clock face. Remember to take pictures or make notes of where each wire was connected to ensure easy reassembly later. In conclusion, removing the clock movement might seem daunting at first, but it’s a simple process with the right tools and technique. With proper care and attention, you can safely remove the clock movement and repair your clock with ease. Just remember to take it slow, use gentle pressure, and keep track of any wires or pieces you remove.
Identifying and Fixing Common Clock Issues
Are you tired of being late for appointments because your clock isn’t working correctly? It’s a common problem that many people face, but fortunately, identifying and fixing common clock issues is easier than you might think. In this article, we’ll discuss some of the most typical clock problems and how to fix them. One of the most common clock problems is that it runs too fast or too slow. If your clock is running too fast, it may be due to a loose spring or a problem with the escapement. In contrast, if your clock is running too slow, it could be due to dirt or dust inside the mechanism. To fix these issues, you can try adjusting the pendulum, cleaning the clock mechanism, or lubricating the gears. Another common issue is that the clock stops working altogether, which can be frustrating. If this happens, it may be due to a broken mainspring, a dead battery, or a damaged clock movement. To fix this, you will need to replace the faulty part or take the clock to a professional repair shop.
Sometimes, the clock may produce an annoying ticking sound, which can be distracting. This issue usually occurs due to wear and tear on the clock’s components or an unbalanced balance wheel. To fix this problem, you can try tightening any loose screws or adjusting the balance wheel’s position. Lastly, the clock’s hands may fall out of sync or stop moving entirely. This problem often occurs due to a misaligned minute hand or a loose gear. To fix this issue, you can try realigning the hands or tightening any loose parts. In conclusion, identifying and fixing common clock issues is not rocket science, and most issues can be resolved with simple adjustments or replacements. By following the tips mentioned in this article, you can enjoy the convenience and functionality of your clock without worrying about any problems. Whether you have a wall clock, grandfather clock, or wristwatch, these tips can help you keep your timepiece in excellent working condition.
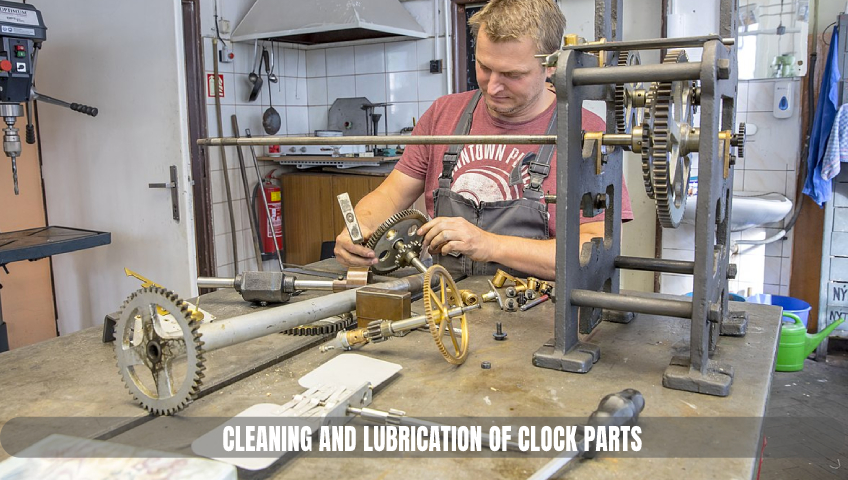
Cleaning and Lubrication of Clock Parts
Keeping a clock running smoothly involves regular cleaning and lubrication of its parts. Over time, dust and debris can accumulate in the clock’s mechanism, causing it to slow down or stop altogether. Fortunately, with a little bit of effort and the right tools, you can easily clean and lubricate your clock’s parts and keep it ticking accurately for years to come. The first step in cleaning your clock is to remove the case back and expose the mechanism. Take care not to touch any of the delicate parts inside the clock, as they can be easily damaged. Use a soft-bristled brush or a can of compressed air to remove any loose debris from the mechanism. Be sure to pay special attention to the gears, as these are the most critical components of the clock.
Next, you’ll need to clean the metal parts of the clock with a specialized clock cleaning solution. These solutions are designed specifically for use on clocks and are formulated to dissolve oil and grime without damaging the metal surfaces. Apply the cleaner to a small brush and carefully work it into all the nooks and crannies of the mechanism. Once you’ve finished cleaning, be sure to rinse the mechanism thoroughly with distilled water to remove any leftover cleaner residue. After cleaning, it’s essential to lubricate the clock’s parts properly. Use a high-quality clock oil to lubricate the pivot points and gears of the mechanism. Avoid using too much oil, as this can cause the mechanism to become gummy and attract more dirt and debris. A tiny drop of oil at each pivot point is usually sufficient. In conclusion, regular cleaning and lubrication of your clock’s parts are key to keeping it running accurately and reliably. With a little bit of effort and attention to detail, you can keep your clock ticking for years to come.
Adjusting the Pendulum for Proper Timekeeping
The pendulum clock is an ancient and reliable timekeeping device that has been in use for centuries. It is a mechanical clock that uses the regular swing of a pendulum to keep track of time accurately. However, over time, the pendulum may require adjustment to maintain accurate timekeeping. In this article, we will discuss how to adjust the pendulum for proper timekeeping. Firstly, ensure that the clock is on a level surface to prevent any deviations. If it’s not, adjust its position until it’s stable. An uneven surface could cause the pendulum to swing at an angle, leading to inaccurate timekeeping.
Next, check the length of the pendulum. The length of the pendulum determines the time it takes to complete one cycle or swing. Using a tape measure, measure the length of the pendulum from the point where it hangs to the center of the bob (the weight at the bottom of the pendulum). Record the measurement accurately. To adjust the pendulum’s length, turn the nut located below the bob. Turning it clockwise shortens the pendulum and makes it run faster, while turning it counterclockwise lengthens it and slows it down. Make small adjustments and wait for the clock to run for some time to see if you have made the correct changes. Repeat this process until you achieve accurate timekeeping.
In case the clock still runs slow or fast, regulate the beat of the pendulum by moving the rating nut slightly up or down. The rating nut is usually located near the top of the clock with a pendulum bar. You can get information from us at any time of the day for clock repair near me. Moving it upward increases the rate, while moving it downward decreases it. Again, make small adjustments until the clock keeps accurate time. In conclusion, adjusting the pendulum for proper timekeeping is a simple process that requires patience and attention to detail. Keep the clock on a level surface, measure the length of the pendulum, adjust it accordingly, and regulate the beat until you achieve accurate timekeeping. With proper maintenance, your pendulum clock will keep reliable time for years to come.
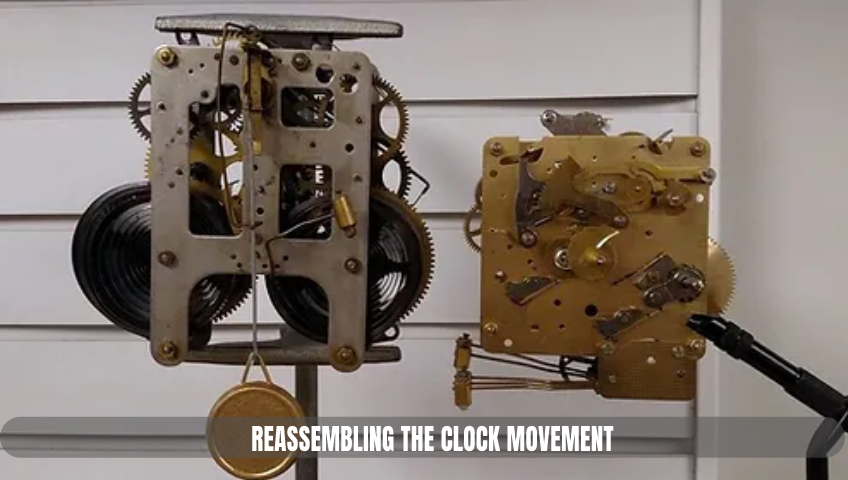
Reassembling the Clock Movement
If you have a broken clock and you’re wondering whether to throw it away or try repairing it, you might want to consider reassembling the clock movement. Clock movements can be delicate, but with a little bit of patience and some guidance, you can restore your clock to working order. In this article, we’ll discuss the process of reassembling the clock movement. First, you’ll need to disassemble the clock movement. Carefully remove the hands, dial, and any other components until you have access to the movement itself. Take note of how everything is connected and where each part goes so that you can easily put it all back together later.
Next, clean each individual component to remove any dirt or debris. A small brush and some gentle soap should suffice for most parts. If any pieces are damaged beyond repair, you’ll need to replace them. Once your components are all clean and ready to go, you can begin the reassembly process. Start by attaching the escapement to the anchor bridge, then add the pallets and verge assembly. Make sure everything is properly aligned and secured in place before moving on.
Next, install the escape wheel and center wheel, being careful not to damage the teeth. Then, attach the third and fourth wheels, followed by the barrel and mainspring. Finally, add the hands and the dial, and make any necessary adjustments to ensure that everything is running smoothly. Once you’re satisfied with the movement, set the time and let it run for a few days to make sure that it keeps accurate time. In conclusion, reassembling a clock movement can be a daunting task, but with some patience and attention to detail, it’s definitely doable. Just take your time, keep track of how everything fits together, and don’t be afraid to seek out advice or guidance if you need it. With a little bit of effort, you can restore your clock to its former glory and enjoy the satisfaction of having repaired it yourself.
Final Steps in Clock Repair for Beginners
If you’re a clock enthusiast or simply someone who wants to learn the art of clock repair, then you’ve come to the right place. As a beginner, it’s important to know that repairing clocks can be a challenging and rewarding experience. In this article, we’ll go over the final steps in clock repair for beginners. The first step in clock repair is to diagnose the problem. It’s essential to identify the issues with the mechanism to determine the necessary repairs. Once you’ve identified the problem, you can move on to the next step, which is disassembling the clock. This step requires patience and a gentle touch to prevent any damage. After disassembling it, clean each individual part separately using a soft brush and a mild cleaning solution. Avoid using any harsh chemicals or abrasive materials that could cause damage to the parts. Be sure to dry each part thoroughly before reassembling.
Next, inspect each part carefully to ensure they are in good condition. Replace any damaged or worn-out parts that are beyond repair. Additionally, lubricate the clock’s movement with clock oil, ensuring smooth operation during assembly. When reassembling the clock, follow the same steps but in reverse order. Take your time when assembling each part, ensuring they fit correctly and securely. Double-check everything before moving on to the next step. Finally, test the clock to ensure it’s working correctly. Wind it up and let it run for a few hours to ensure its accuracy. If there are any issues, repeat the process until everything works correctly.
In conclusion, clock repair can be a challenging yet rewarding experience. By following these final steps in clock repair for beginners, you can fix common problems and breathe new life into an old or broken clock. Just remember, patience and attention to detail are key to a successful repair.